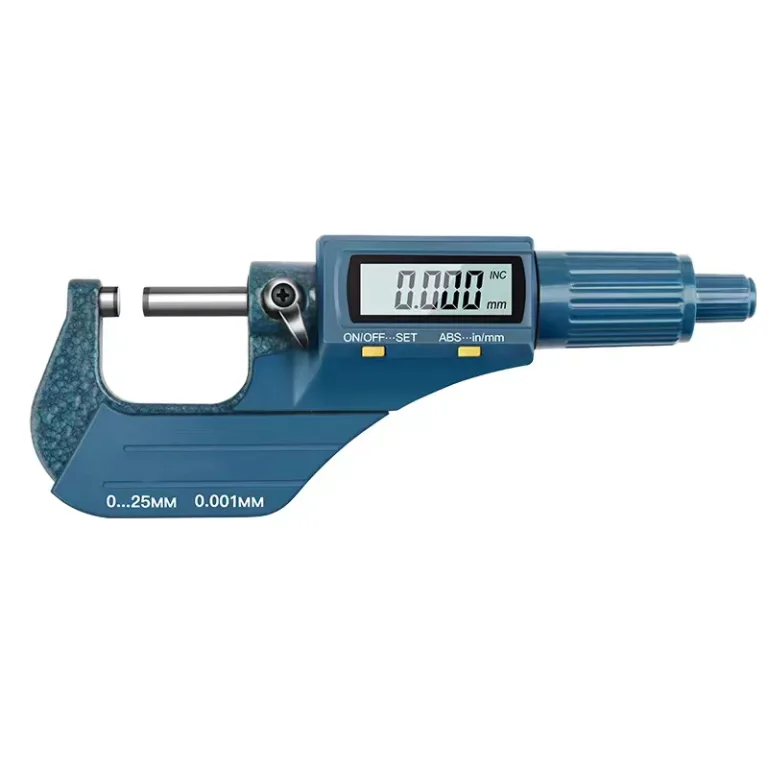

Accurate measurements are paramount in many fields, from mechanical engineering to woodworking. One of the most reliable tools for this task is the micrometer, renowned for its precision. Understanding how to use and read a micrometer is essential for achieving the accuracy required in these professions. This article will guide you through the components of an external micrometer and the steps necessary to obtain precise measurements.
Components of an External Micrometer
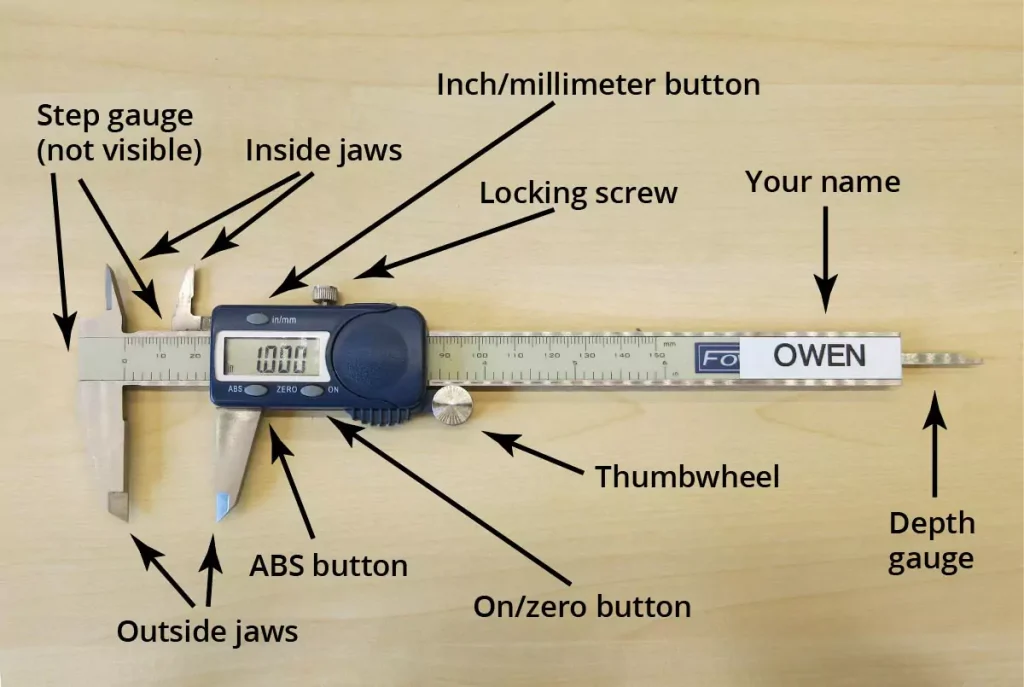
To fully understand how to use a micrometer, it’s crucial first to become familiar with its various components. Each part plays a vital role in ensuring accurate measurements.
Frame
The frame of the micrometer is its backbone. Usually made of steel or cast iron, it provides a sturdy and stable structure for mounting the other components. A well-built frame reduces any distortions that could otherwise affect the accuracy of the measurement. Always ensure that the frame is devoid of rust and in good condition before taking a measurement.
Anvil
Located at one end of the frame, the anvil serves as one of the measuring surfaces in a micrometer. When you place the object to be measured between the anvil and the spindle, the anvil provides a firm and static point against which the measurement is taken. The anvil must be clean and flat to ensure precise readings.
Spindle
Opposite the anvil lies the spindle, a movable cylindrical component that makes contact with the object being measured. Turning the thimble advances or retracts the spindle, which closes in on the object to be measured. The spindle must move smoothly without any wobble to assure accurate measurements. Any dirt or damage on the spindle can result in erroneous readings.
Micrometer Screw
The micrometer screw is the heart of the micrometer’s precision. This finely threaded screw, located inside the spindle, converts the rotational movement of the thimble into the precise linear motion of the spindle. The accuracy of your measurements depends on the precision of this screw, making it one of the most critical components to maintain.
Sleeve
The sleeve, or barrel, is a stationary part of the micrometer engraved with a linear scale. This scale is essential for reading measurements, as you will compare the readings from the sleeve with those from the thimble and vernier scales. The lines on the sleeve need to be clearly legible for accurate measurement readings.
Thimble
The thimble is a cylindrical component that you turn to move the spindle. It is marked with a secondary scale that works in tandem with the sleeve’s scale to provide precise measurements. The thimble should turn smoothly and consistently, and its markings should be easy to read to ensure precise adjustments and readings.
Vernier
The vernier scale on a micrometer adds even more precision to the measurement process. This supplementary scale, typically found on the sleeve or thimble, allows for readings to the nearest thousandth of an inch or hundredth of a millimeter. When you align the thimble scale and vernier scale, you can obtain a reading that surpasses the basic resolution provided by the thimble and sleeve scales alone. This level of detail is crucial for applications requiring the utmost accuracy.
Locking Lever/Wheel
The locking lever or wheel is an essential component used to securely hold the spindle in place after taking a measurement. This feature ensures that the reading remains consistent and prevents any accidental movement that could alter the measurement. Engaging the lock allows you to move the micrometer away from the object while maintaining the measured span, offering a stable reference if you need to record the measurement later.
Ratchet
The ratchet is integrated into the micrometer to provide consistent pressure when the spindle contacts the object. By emitting a series of clicks as you turn it, the ratchet ensures that you apply the same amount of force each time you measure. This consistency is vital for achieving repeatable measurements, as excessive or insufficient pressure can distort the reading. Always use the ratchet to finalize the position of the spindle during measurements.
Handle
Some micrometers include a handle, particularly in larger models or those designed for specialized applications. The handle aids in holding the micrometer steady and reduces strain during prolonged use. Ensuring a stable grip contributes to the accuracy of your measurements, as it minimizes the risk of unintentional movements that could affect the reading.
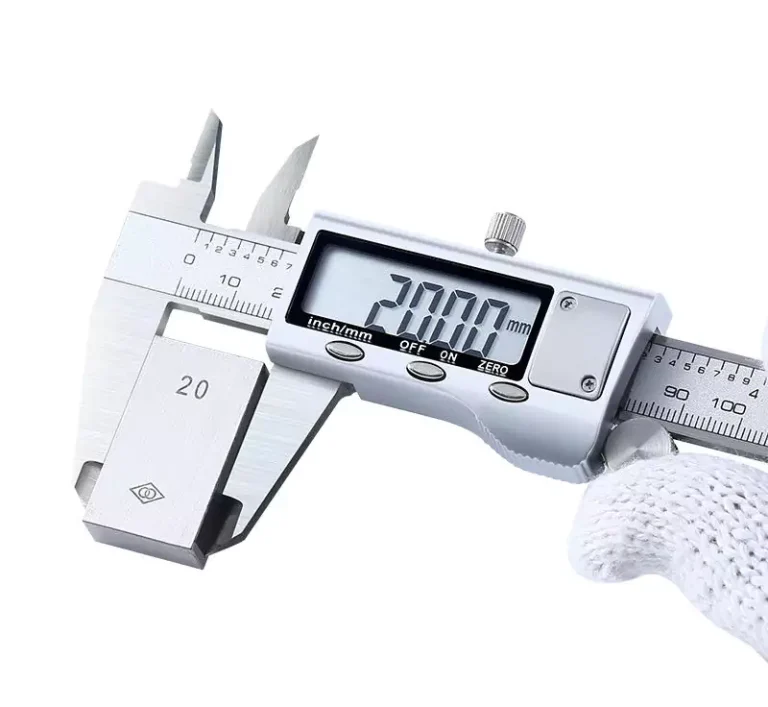
Three Steps to Measure with a Micrometer
Knowing how to read the scale on a micrometer is only part of the equation. Accurate measurement also involves proper handling and technique. Below are the essential steps to measure with a micrometer.
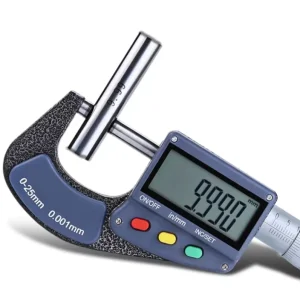
Cleaning the Micrometer
Before taking any measurements, it’s essential to ensure that your micrometer is clean. Use a soft cloth to wipe down the anvil, spindle, and frame, removing any dirt or debris that could affect the measurement. Special cleaning kits are available for micrometers that contain non-abrasive cleaners and brushes. Regular cleaning not only ensures accuracy but also prolongs the life of your tool.
Start Measuring
Once the micrometer is clean, open the spindle by turning the thimble. Place the object to be measured between the anvil and spindle, and gently turn the thimble until the spindle makes contact with the object. Use gentle pressure to avoid deforming the object being measured, which could lead to inaccurate readings. Engage the ratchet when the spindle contacts the object to ensure consistent pressure for all measurements.
Read the Measurement
To obtain a final measurement, you need to read multiple scales on the micrometer carefully. Each section of the micrometer provides crucial information that, when combined, gives you a highly accurate measurement. Learning to interpret these scales takes a bit of practice but is essential for utilizing the micrometer’s full precision.
How to Read a Micrometer
Reading a micrometer accurately involves interpreting values from several different scales: the sleeve scale, the micrometer scale, and the vernier scale. Here’s how to read each one and combine them for the final measurement.
Read the Sleeve Scale
Start by reading the largest value on the sleeve, which generally includes whole inches or millimeters and any incremental fractions thereof. These are usually marked clearly on the linear scale. Record this value as your base measurement. For instance, if the sleeve shows 0.5 inches, this becomes your initial figure for calculating the total measurement.
Read the Micrometer Scale
Next, observe the thimble for its additional readings, which usually represent fractions of the unit marked on the sleeve. Rotate the thimble to align its zero mark with the sleeve scale’s baseline, noting the markings that denote further precision, often in thousandths of an inch or hundredths of a millimeter. Add this value to the sleeve reading. For example, if the thimble shows 0.025 inches, add this to your earlier 0.5 inches for a subtotal of 0.525 inches.
Read the Vernier Scale
If your micrometer includes a vernier scale, it further refines the measurement. Align the vernier scale’s markings with the thimble scale to find the exact point where they match most closely. This additional value, often in ten-thousandths of an inch or thousandths of a millimeter, is added to your subtotal. For instance, if you find an additional 0.0005 inches from the vernier scale, your measurement evolves from 0.525 inches to a precise 0.5255 inches.
Calculate the Total Measurement
Combine the values read from all the scales to determine the final measurement. This involves adding the sleeve scale reading, micrometer scale reading, and any vernier scale reading if applicable. Ensure your final result considers all the constituents for full precision. For our example with added values, you get a highly accurate total measurement of 0.5255 inches.
Micrometer Maintenance and Tips

Regular maintenance is vital for ensuring that your micrometer remains accurate and functional over time. Below are some best practices for maintaining your micrometer.
Maintenance and Cleaning
Consistent cleaning is imperative to maintain a micrometer’s accuracy. Use a soft, lint-free cloth to clean the frame, anvil, and spindle after each use. Occasionally, apply a small amount of high-quality instrument oil to the spindle and thimble to ensure smooth operation. Make sure the screw threads inside the spindle are clean as well to avoid measurement inaccuracies caused by dirt buildup.
Calibrate When Necessary
Over time, even the most well-maintained micrometers can fall out of calibration. It’s advisable to periodically check the calibration using a calibration standard or gauge blocks. If discrepancies are found, recalibrate the micrometer according to the manufacturer’s instructions. Calibration ensures that the precision of your measurements remains consistent and reliable.
Micrometer Storage
Proper storage can significantly extend the life of your micrometer. Store it in a protective case when not in use to safeguard it from dust, moisture, and mechanical damage. Avoid storing the micrometer in a fully closed position; always leave a slight gap between the anvil and spindle. This prevents possible deformation of the measuring surfaces and ready enables for immediate use when next needed.
In summary, understanding the components, proper handling, and accurate reading techniques of a micrometer can significantly improve the accuracy of your measurements. Regular maintenance and correct storage will ensure your micrometer remains a reliable tool for years to come. By mastering these practices, you will not only achieve precise measurements but also develop a deeper appreciation for the intricacies of precision measurement tools.
Tips for Accurate Measurement
Clean the Object and Micrometer
Thoroughly cleaning both the micrometer and the object to be measured is crucial. Any dirt, oil, or debris on the surfaces can lead to inaccurate readings. Use a lint-free cloth to wipe all surfaces before measuring. This ensures that no contaminants interfere with the contact points between the micrometer and the object. Regular cleaning of your micrometer also helps maintain its precision and longevity.
Use the Ratchet Stop
The ratchet stop is designed to apply a consistent measuring force, which is vital for obtaining accurate readings. Using the thimble alone can lead to inconsistency, as the amount of force applied may vary. The ratchet stop clicks when the correct force is applied, preventing over-tightening and reducing user error. Always use the ratchet stop to ensure that your measurements are precise and repeatable. This practice enhances measurement consistency and accuracy.
Avoid Extreme Temperatures
Temperature changes can affect both the micrometer and the material being measured. Metals expand and contract with temperature variations, which can lead to inaccurate readings. For best results, take measurements in a controlled environment where the temperature is stable. Also, avoid holding the micrometer for extended periods, as body heat can cause slight expansion. Maintaining a consistent temperature minimizes measurement errors.
Regular Calibration
Regular calibration is essential to maintain the accuracy of your micrometer. Over time, usage and environmental factors can lead to slight deviations in measurement accuracy. Calibrating your micrometer ensures it provides precise readings and conforms to established standards. Use a calibration standard or reference gauge to check and adjust your micrometer periodically. Regular calibration checks enhance the reliability of your measurements and extend the instrument’s lifespan.
By understanding the various types and parts of a micrometer, and following effective usage and measurement tips, you can significantly improve your precision and skill in using this essential tool. Implementing these practices will help you avoid common mistakes and achieve accurate, reliable measurements consistently.
Worked Examples
Smallest and Largest Reading
Smallest Possible Reading: 0.01 mm
A micrometer can achieve extremely fine measurements, with the smallest possible reading typically being 0.01 mm. Understanding the graduation increments on the thimble scale is crucial for making these precise measurements. Each division on the thimble scale generally represents an increment of 0.01 mm. For instance, when the thimble rotates and a single division passes the reference line on the sleeve, the micrometer has moved by 0.01 mm.
Largest Possible Reading: 0.49 mm
Conversely, the largest possible reading on the thimble scale before resetting to zero is usually 0.49 mm. This is because the thimble has 50 divisions, each representing 0.01 mm. Therefore, 49 divisions would collectively represent 0.49 mm. When 50 divisions have passed, the thimble completes one full rotation, and the next reading would show an increment on the main scale, effectively resetting the thimble to zero.
Systematic Error Due to Zero Error
Failure to Account for Zero Error Introduces a Systematic Error
Zero error occurs when the micrometer’s reading is not zero when the anvil and spindle are closed. Not accounting for zero error introduces a systematic error in all measurements. This error must be corrected to ensure accurate readings. The impact of zero error should be evaluated each time before taking measurements.
Results in Precise but Inaccurate Readings
Failure to correct zero error results in readings that may be precise—meaning they are consistent and repeatable—but inaccurate, as they are offset by the zero error. Regularly checking and adjusting for zero error ensures that the micrometer provides both precise and accurate readings.
Basic Measurement Example
Main Scale Reading: 5 mm
In this example, the main scale shows a reading of 5 mm. The reading on the main scale is obtained from the line on the sleeve that is aligned with the reference line on the thimble.
Thimble Scale Reading: 28 Divisions × 0.01 mm = 0.28 mm
On the thimble scale, 28 divisions are visible past the reference line. Each division corresponds to 0.01 mm, thus the thimble reading is 28 × 0.01 mm = 0.28 mm.
Total Measurement: 5 mm + 0.28 mm = 5.28 mm
Combining the two readings, the total measurement is 5 mm + 0.28 mm = 5.28 mm. This example illustrates the importance of correctly using both the main and thimble scales for accurate measurements.
Measurement with Positive Zero Error
Main Scale Reading: 3 mm
For this example, the main scale shows a reading of 3 mm.
Thimble Scale Reading: 15 Divisions × 0.01 mm = 0.15 mm
The thimble scale shows 15 divisions, resulting in 15 × 0.01 mm = 0.15 mm.
Observed Measurement: 3 mm + 0.15 mm = 3.15 mm
Thus, the uncorrected observed measurement is 3 mm + 0.15 mm = 3.15 mm.
Zero Error: 2 Divisions × 0.01 mm = 0.02 mm
If there is a positive zero error of 2 divisions, the zero error is 2 × 0.01 mm = 0.02 mm.
Corrected Measurement: 3.15 mm – 0.02 mm = 3.13 mm
The corrected measurement, accounting for the positive zero error, is 3.15 mm – 0.02 mm = 3.13 mm.
Measurement with Negative Zero Error
Main Scale Reading: 4 mm
In this instance, the main scale reads 4 mm.
Thimble Scale Reading: 22 Divisions × 0.01 mm = 0.22 mm
The thimble scale shows 22 divisions, equating to 22 × 0.01 mm = 0.22 mm.
Observed Measurement: 4 mm + 0.22 mm = 4.22 mm
The observed measurement before correction is 4 mm + 0.22 mm = 4.22 mm.
Zero Error: 5 Divisions × 0.01 mm = 0.05 mm
If there is a negative zero error of 5 divisions, the zero error is 5 × 0.01 mm = 0.05 mm
Corrected Measurement: 4.22 mm + 0.05 mm = 4.27 mm
The corrected measurement, considering the negative zero error, is 4.22 mm + 0.05 mm = 4.27 mm.
Precision Measurement with Positive Zero Error
Main Scale Reading: 0 mm
For a precision measurement, the main scale shows 0 mm.
Thimble Scale Reading: 40 Divisions × 0.01 mm = 0.40 mm
The thimble scale shows 40 divisions, resulting in 40 × 0.01 mm = 0.40 mm.
Observed Measurement: 0 mm + 0.40 mm = 0.40 mm
The uncorrected observed measurement is 0 mm + 0.40 mm = 0.40 mm.
Zero Error: 3 Divisions × 0.01 mm = 0.03 mm
For this example, there is a positive zero error of 3 divisions, making the zero error 3 × 0.01 mm = 0.03 mm.
Corrected Measurement: 0.40 mm – 0.03 mm = 0.37 mm
The corrected measurement, accounting for the zero error, is 0.40 mm – 0.03 mm = 0.37 mm.
Advanced Measurement with Larger Zero Error
Main Scale Reading: 2 mm
Lastly, in this advanced example, the main scale shows a reading of 2 mm.
Thimble Scale Reading: 45 Divisions × 0.01 mm = 0.45 mm
The thimble scale shows 45 divisions, resulting in 45 × 0.01 mm = 0.45 mm.
Observed Measurement: 2 mm + 0.45 mm = 2.45 mm
The uncorrected observed measurement is 2 mm + 0.45 mm = 2.45 mm.
Zero Error: 10 Divisions × 0.01 mm = 0.10 mm
In this example, the zero error is significantly larger at 10 divisions, making the zero error 10 × 0.01 mm = 0.10 mm.
Corrected Measurement: 2.45 mm + 0.10 mm = 2.55 mm
The corrected measurement, after accounting for the significant zero error, is 2.45 mm + 0.10 mm = 2.55 mm.
By exploring these detailed worked examples, the nuances of micrometer measurements become clearer. Understanding and accounting for possible zero errors, whether positive or negative, ensures that each reading is as accurate as the instrument allows. Regular practice and attention to these details will significantly enhance your proficiency in using a micrometer.